Step 1: Prepare the File for Import into HubSpot
1. Verify the File Format
Ensure that the file you want to import is in XLS or CSV format, as these are compatible with HubSpot.
2. Review the Properties in the File
Before importing, examine the columns in your file to identify the properties it contains. Match them with the existing properties in your HubSpot CRM. If certain properties are missing in HubSpot, they must be created before proceeding.
3. Example from the File
In the provided example, the following properties do not exist in HubSpot by default and must be created:
%2010.23.52%20a.m..png?width=450&height=58&name=Captura%20de%20pantalla%202024-11-23%20a%20la(s)%2010.23.52%20a.m..png)
- Company ID (ID)
- License (License)
4. Create Missing Properties in HubSpot
Before importing the file, we need to create the properties missing in HubSpot. Follow these steps for each property:
Step 4.1: Create the “Company ID” Property
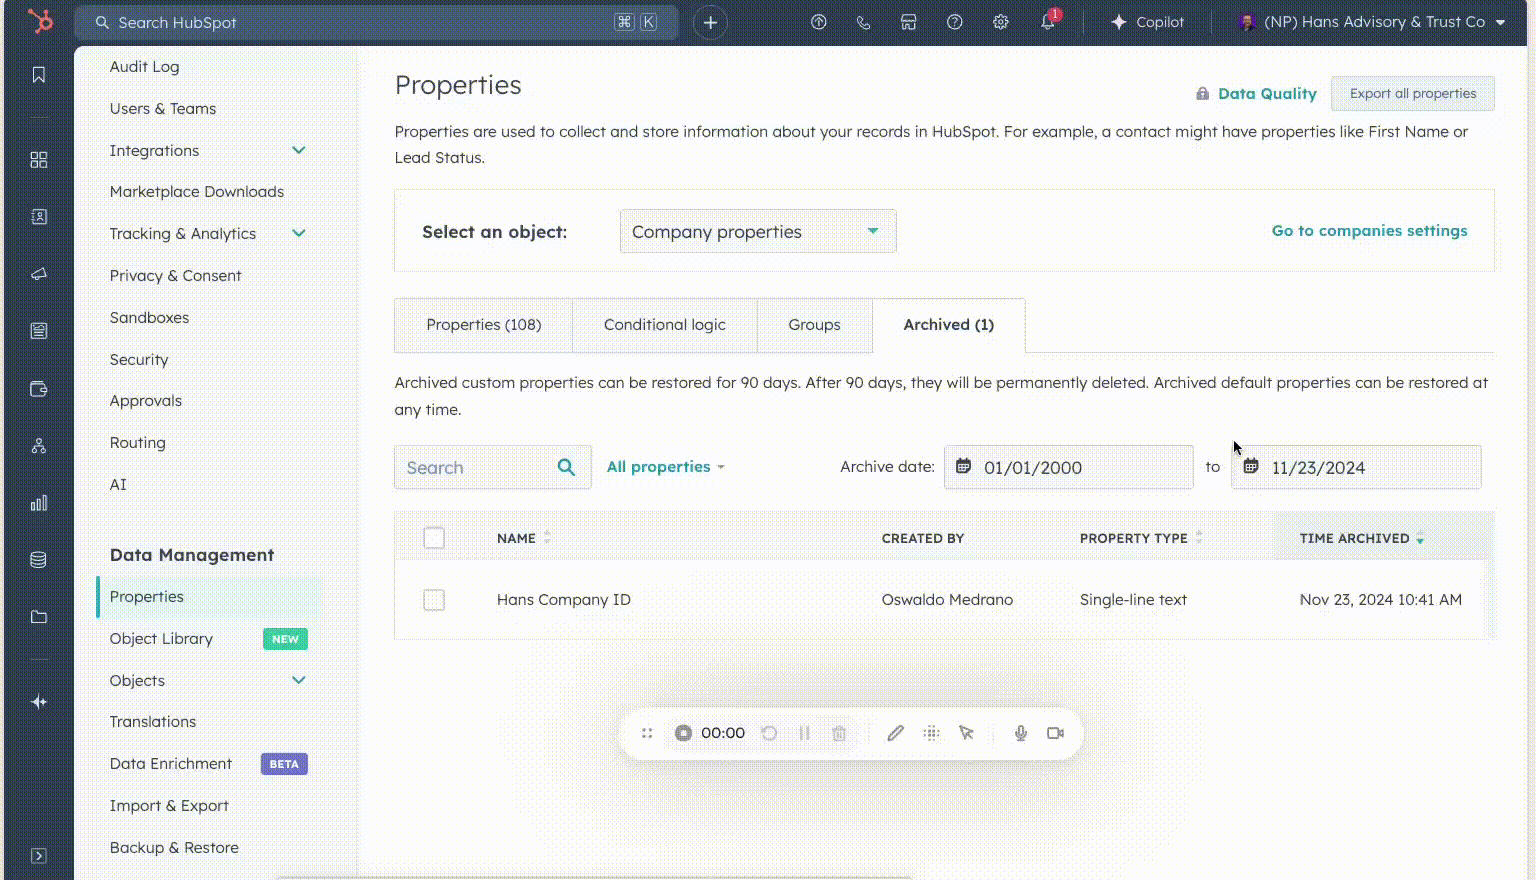
Go to Settings, then, on the left-hand sidebar, navigate to the section Data Management. Under this title, locate and click on Properties. In the Select an Object dropdown, choose Company Properties.
Click on Create Property, enter the name Unique Company ID, select the group Hans Properties, and create a Single-line Text property. In the rules, make sure to set this property as a unique value. Be very careful! You only have 10 of these, and they should only be used to set additional keys for the company domain in the database.
Step 4.2: Create the “License” Property
Click on Create Property, enter the Label, the Description, and select the group Hans Properties Set. Under Field Type, choose Dropdown Select. You can either create the options one by one or click on Load Options and paste your list directly. Finally, click Create.

5. Clean and Prepare Files for Import
Transfer your License Excel workbook file to a clean, flat database format in Excel, ensuring that each cell contains only one piece of data. For example, in the database provided, I noticed several emails in the same cell—this must be separated.
%2010.58.59%20a.m..png?width=450&height=146&name=Captura%20de%20pantalla%202024-11-23%20a%20la(s)%2010.58.59%20a.m..png)
This is the correct file with the License database to import and create the email send:
%2011.11.03%20a.m..png?width=450&height=285&name=Captura%20de%20pantalla%202024-11-23%20a%20la(s)%2011.11.03%20a.m..png)
Same with LMO report workbook.
%2011.15.05%20a.m..png?width=450&height=83&name=Captura%20de%20pantalla%202024-11-23%20a%20la(s)%2011.15.05%20a.m..png)
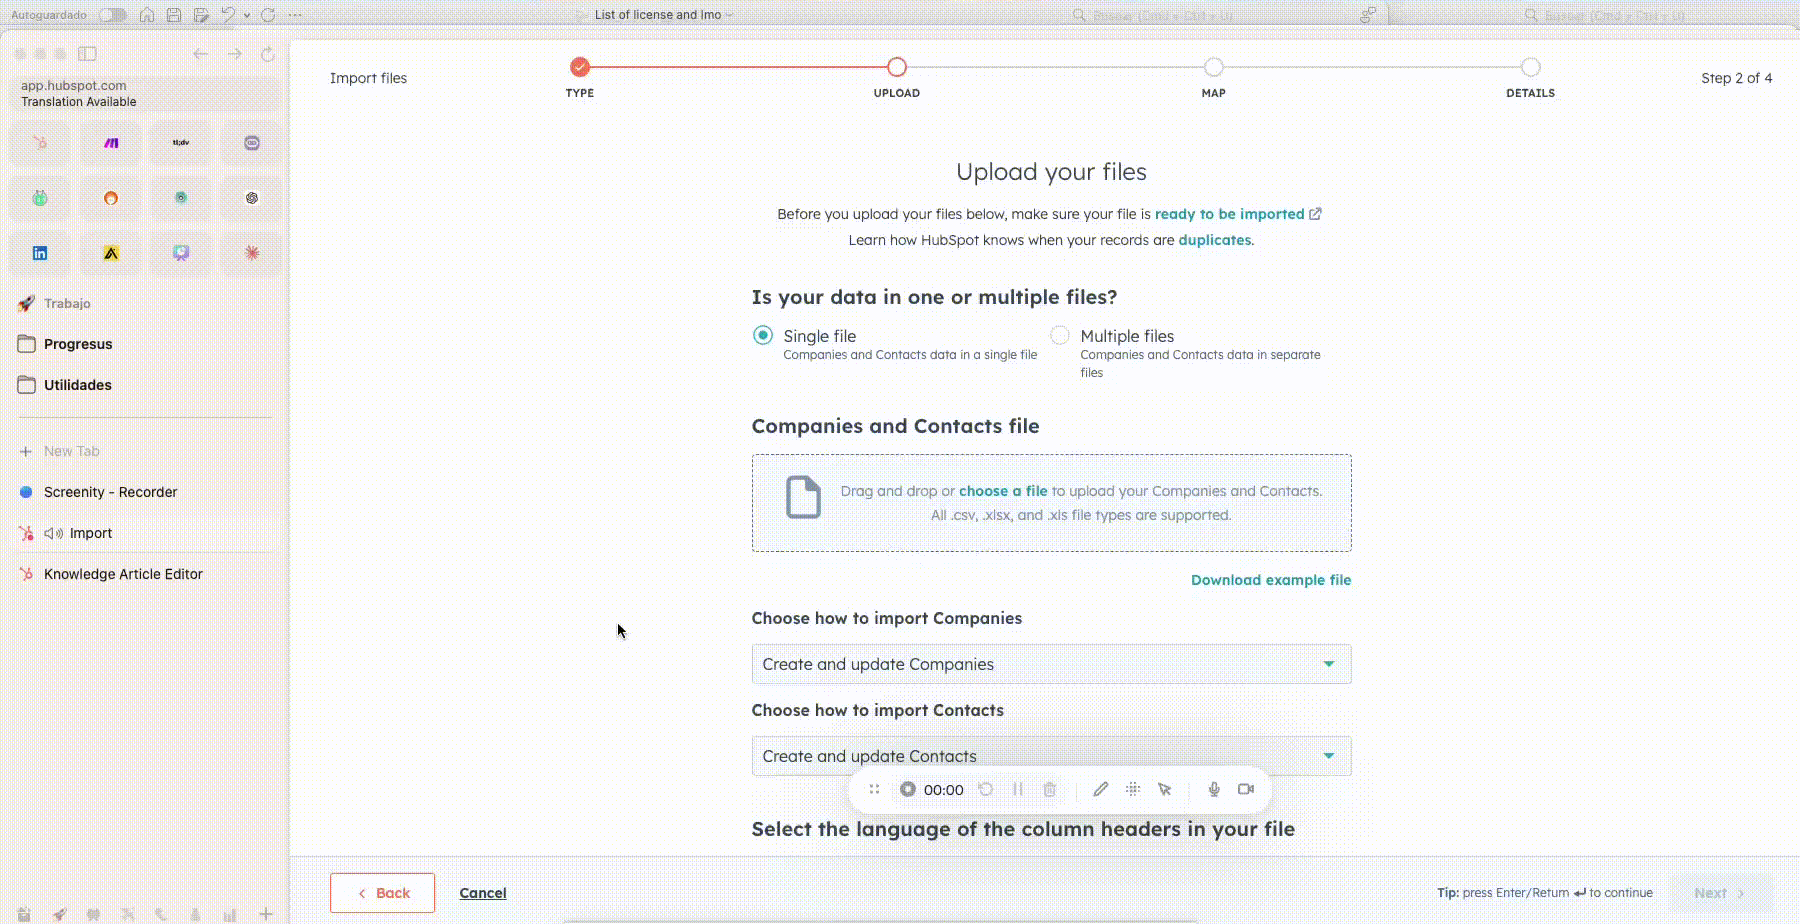
6. Start of Record Import Process.
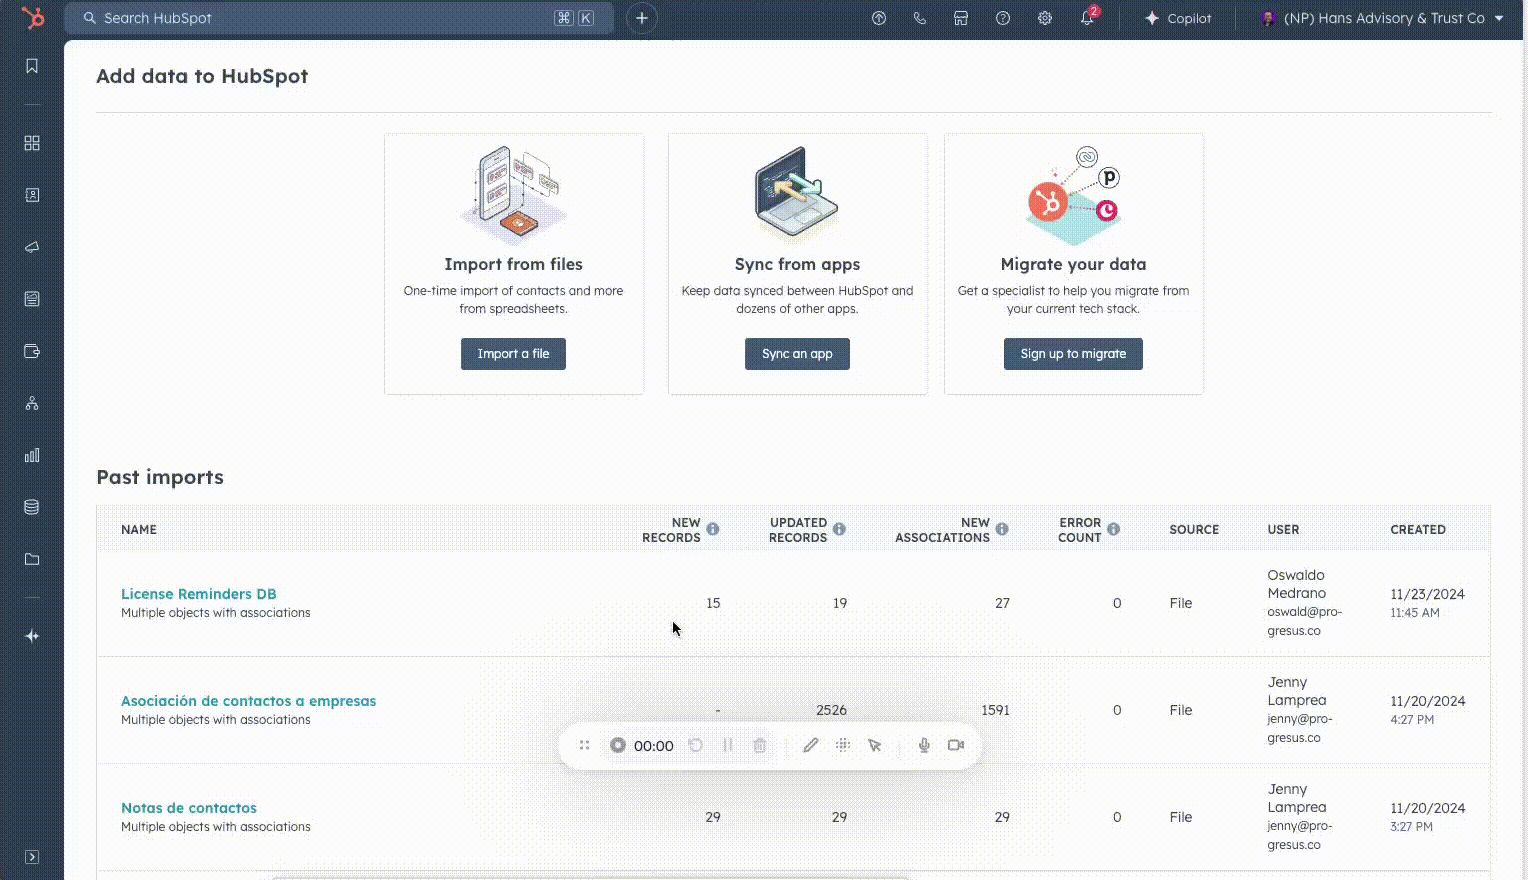
To import your corrected files, go to the left-hand menu, click on Contacts or Companies, and then click on the white button with an orange outline in the top-right corner of the screen labeled Import. Click on the button Import a file, and then select Start Import.

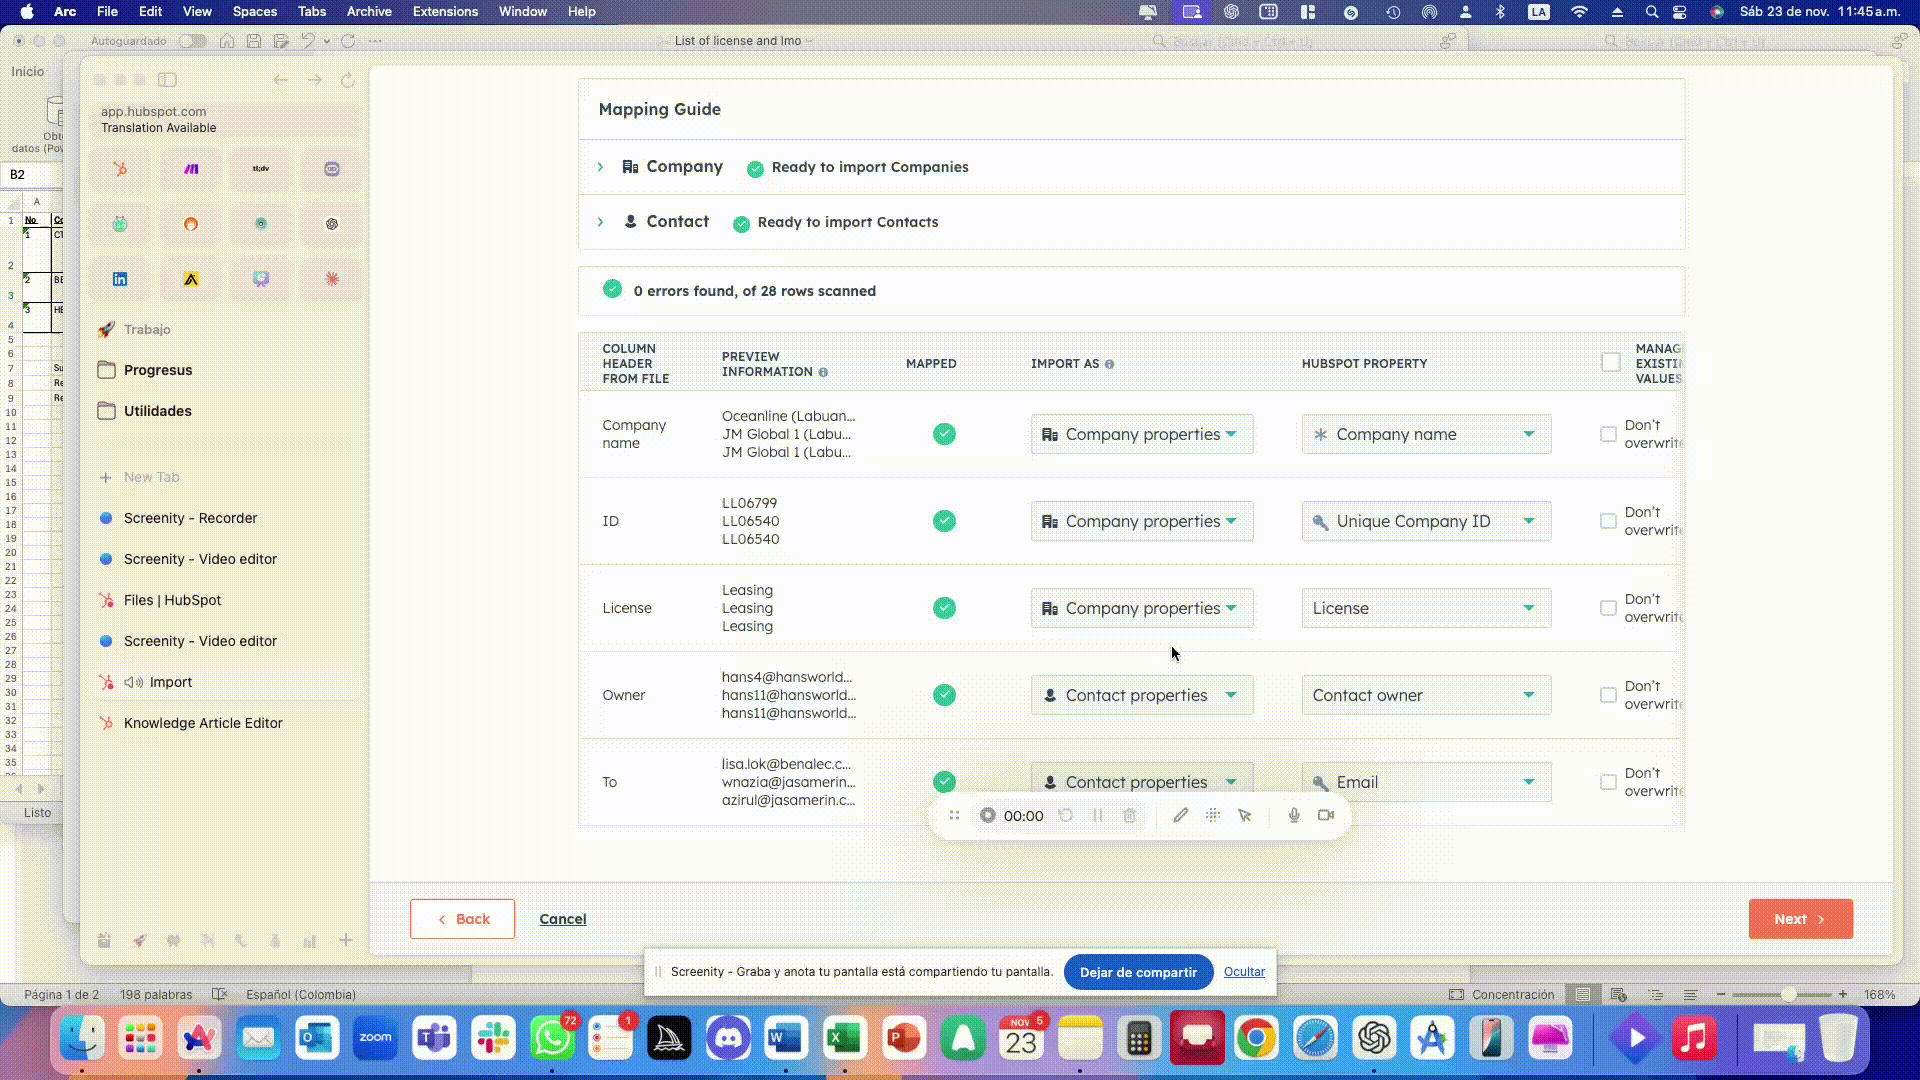
Click on Companies and Contacts, then click Next.
%2011.33.18%20a.m..png?width=450&height=262&name=Captura%20de%20pantalla%202024-11-23%20a%20la(s)%2011.33.18%20a.m..png)
Drag the file you want to import from your computer.
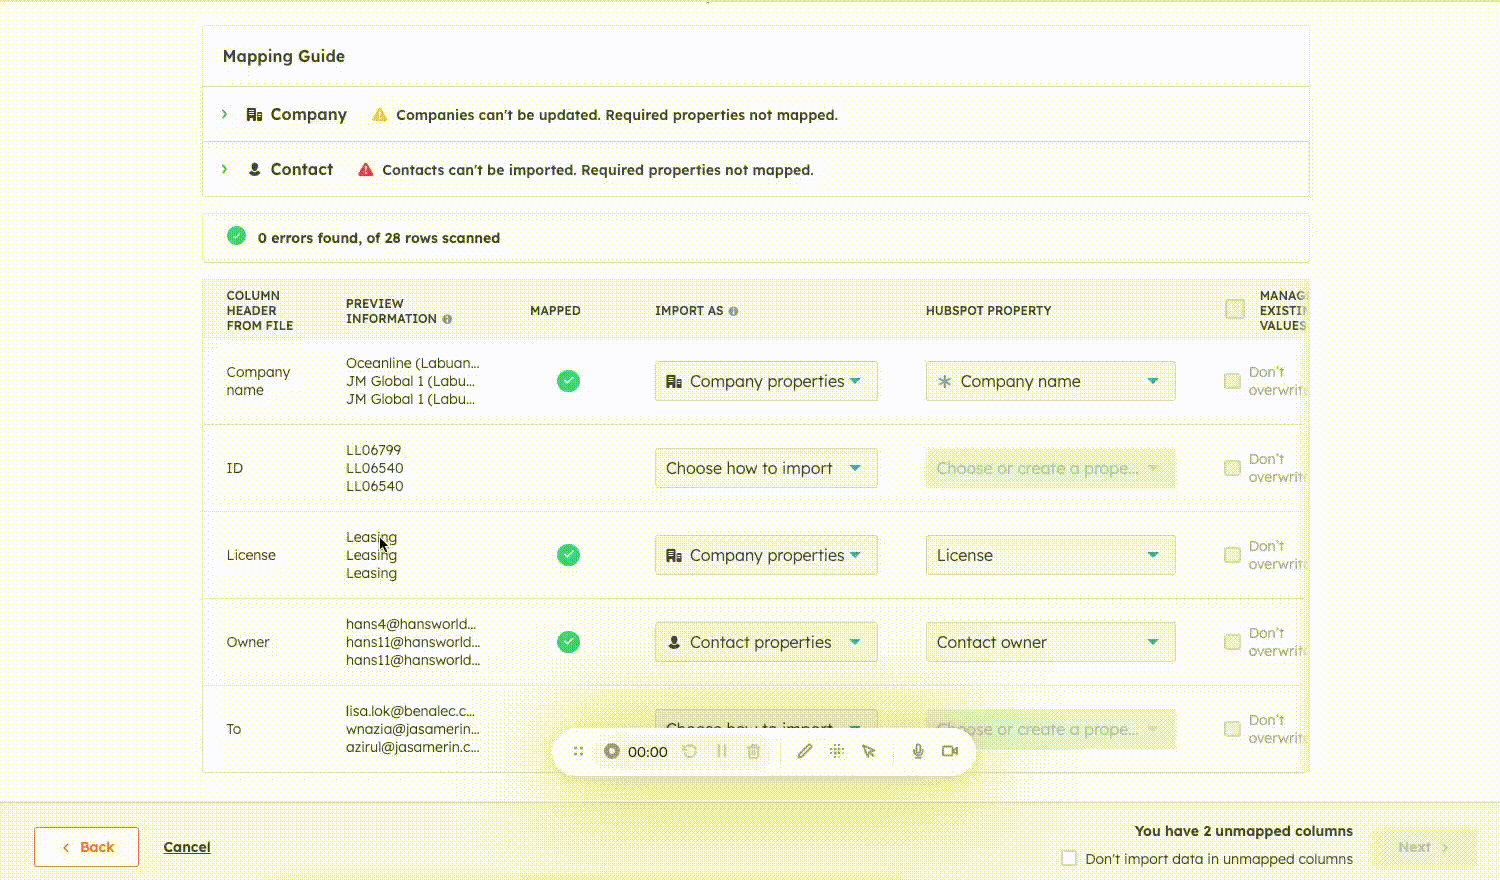
Match the properties in your file to the corresponding properties in HubSpot. It is important to note that whenever you upload a file, you must include “key” properties, or HubSpot will not allow the import. For this case, the Company ID is the Hans Unique ID we created, and for people, it is their Email. Then, click Next.
Define a name for the import and check the box indicating that an import list will be created. This will generate a list in the Lists section within the Contacts menu. Then, check the box confirming that you certify these contacts have given consent to receive emails and for their information to be processed.
Finally, mark your contacts as Marketing Contacts. This will allow you to send them marketing emails.
Be careful! If you mark more marketing contacts than you have purchased, HubSpot will automatically upgrade your contact tier.
As you can see, the import was successful. You can now review the imported records by clicking on Back to Import History.
%2011.51.49%20a.m..png?width=450&height=265&name=Captura%20de%20pantalla%202024-11-23%20a%20la(s)%2011.51.49%20a.m..png)
Now, in the window, you can see the import and review the imported contacts and companies. In Contacts, you will notice that only 20 contacts were imported, even though the file contains 29. This is because several contacts, such as azirul@jasamerin.com.my, are repeated multiple times (e.g., 4 times), and the system does not create duplicates.
Repeat the same process with the LMO Report database.
Note: The purpose of this Excel file is to send an email. In HubSpot, you cannot use CC or BCC in marketing emails. If the goal is to track the performance of the email, it’s better to review it through the email analytics. If the purpose of CC or BCC is to inform other people about the email, it’s more effective to create an internal notification that alerts them about the email and allows them to view its performance.